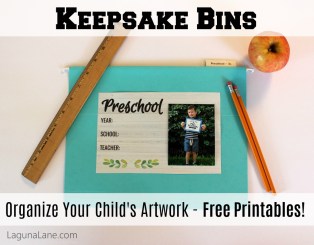
Children create so much artwork, hand prints, drawings, stories, etc. I’m going to share how I got on top of all of that artwork and put it into special and organized keepsakes bins. The upfront time investment to set it up will save me so much time in the years to come. And the keepsake bins will be a special treasure as my children grow older.
Here’s a sneak peek of the finished product to get you motivated!

Gather Supplies
Supplies:
- File bins
- Mine are from Office Depot – bought on sale for $7 each
- File folders
- Printer & paper
- White cardstock for bin label (optional)
- Label printer for tabs (optional) – I use an old Dymo – it’s nothing fancy but I love the finished look it gives file tabs!
Prepare the Keepsake Bins
Now let’s get the bins ready for the artwork and keepsakes!
Label File Folder Tabs
First, create folder tabs for each school year. My folders start with “Toddler” for artwork created before they were in school, and then they move on to “Preschool – 2s,” “Preschool – 3s,” etc. Finally, they go to “Kindergarten,” “1st Grade,” all the way to “Senior.”
Add any extra folders you’d like. For example, I added a “Cards” folder. You may also want an “Awards” folder or a specific sport folder (“Soccer”).
I used my old school Dymo label maker, which prints a label on an adhesive strip. Label makers are surprisingly affordable and make the finished product look so neat! I’m sure your kids would also love tabs hand-written by a parent, since handwriting can be so sentimental!

Add Front Folder Labels
Next, print my free printable folder labels to place on the front of each file folder. It allows you to record some basic information about the school year, and it has a place to add a photo (so fun to see over the years!).

I created two versions. One is a full-page folder label, which will print on a full 8.5″ x 11″ page.

The second is half-page labels, so each label is half of an 8.5″ x 11″ page. I opted for this style in my bins to allow some of the folder color to show around the edges.

To size down the photos for the half-page version, I created a simple 4″ x 6″ collage with two vertical photos. It makes them the perfect size for the smaller labels! I decided to use photos from the first day of school for that year, but a professional school photo would also be cute!

How cute is this?! We’ve only had 3 years of preschool so far, and it’s already making me sentimental!

Create Labels for Keepsake Bins
The final step is to create the label for the front of the keepsake bin with your child’s name. The last page of my printable file has a blank wreath page. Just add your child’s name!

I “laminated” my bin labels using Scotch self-seal laminating roll, just to give it more durability. You could also use clear packing tape to seal down all of the edges.

Sort the Artwork
For me, sorting and culling the artwork is the hardest step. During the school year, I keep pretty much all of the artwork and papers they’re sent home with in a big accordion file folder. Then at the end of each school year, I go through it all and force myself to get rid of about 90% of it. I primarily keep the hand print & footprint pieces, the artwork and writing that’s a “first,” and the pieces that are a special memory for me. For just the past school year for one child, here’s the artwork I got rid of.

While it’s not a fun process, I know that both my kids and I will appreciate not having 300 pages to wade through for each school year.
After filtering down the artwork to the pieces I wanted to keep, I placed it in the corresponding school year folder.

Before and After Photos
Below is my before photo. I culled the artwork each year and put it into file folders, but it certainly wasn’t attractive! I’ll enjoy this process so much more now that I have a neat and organized keepsake bin to place it in.

By the way, I realize I have issues with my “culling.” I wish I could save it all, so I probably end up keeping too much. There may be more culling in my future to make all of the school years fit in one bin!
Anyway, here is my after photo.

Are you ready to get your child’s artwork organized and neatly stored away? You won’t regret this project that you and your child will appreciate for years to come!

P.S. Here are some other great ideas on how to display, organize, and save your child’s artwork.


